
You can convert a PowerPoint presentation to video in three ways: add AI narration and a presenter, export the slides directly as an MP4, or record yourself explaining the presentation before exporting it.
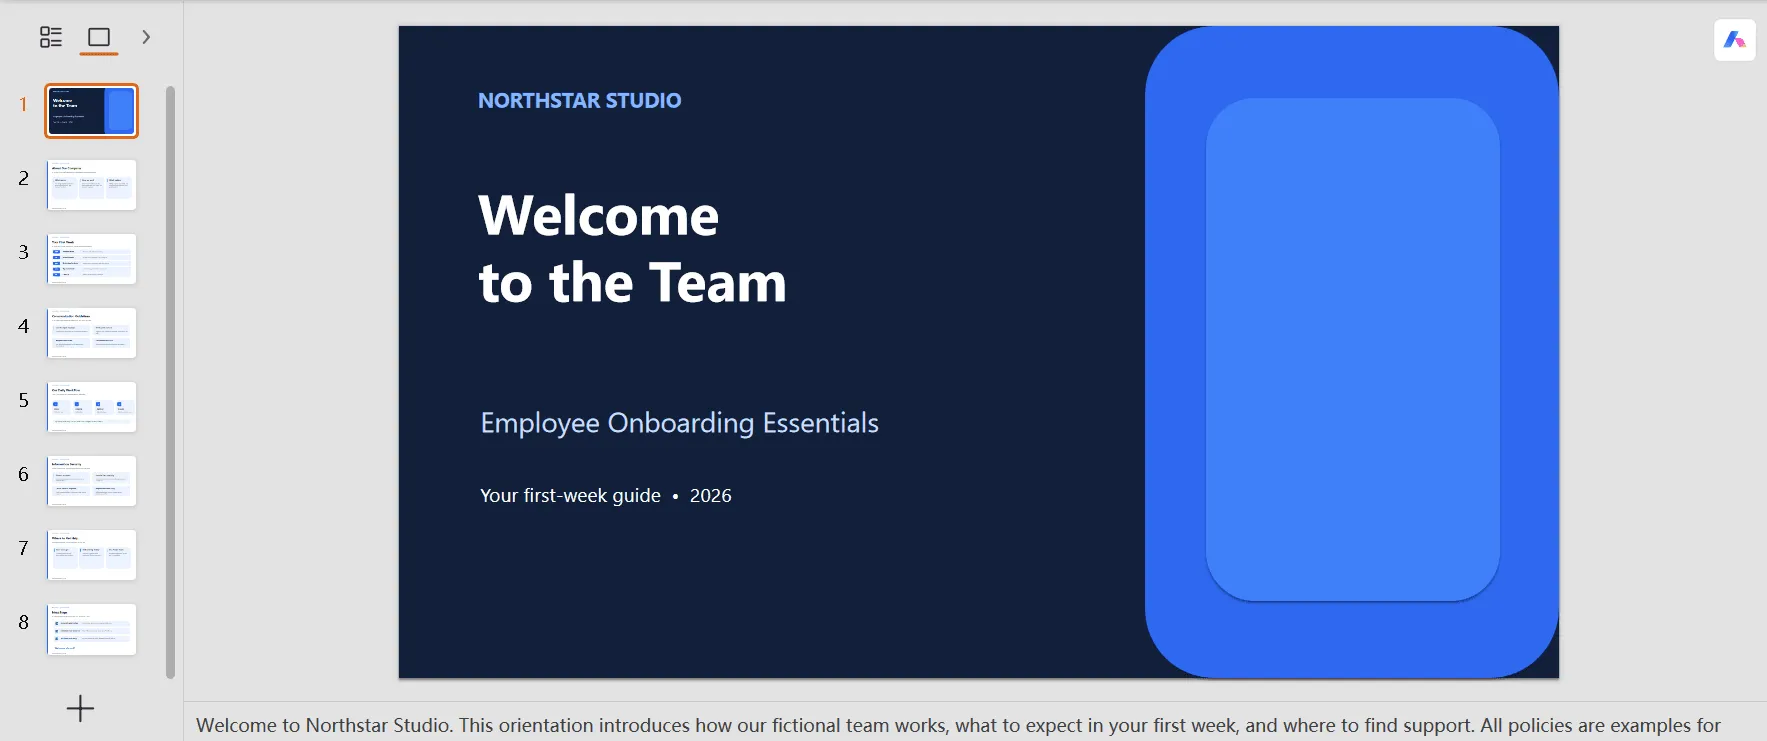
For this walkthrough, I used an eight-slide employee onboarding presentation, Welcome to the Team, with Speaker Notes I’d prepared for each slide. Use the table below to choose a workflow for your own deck.
| Your starting point | Method to use | What you need to prepare |
|---|---|---|
| Slides that need AI narration and an on-screen presenter | JoggAI PPT to Video | A PPT, PPTX, or PDF, plus notes or a script if available |
| A deck ready to play, with or without previously recorded audio | PowerPoint video export | Finished slides and suitable timings |
| Slides you want to explain in your own voice | PowerPoint recording, followed by export | A microphone, a speaking outline, and an optional camera |
Before You Start: Prepare Your Slides for Video
Keep the original PPTX so you can update the slides and notes when the material changes.
Review the presentation at the size your audience will watch it. A widescreen 16:9 deck is a practical starting point for desktop training and course players. For mobile viewers, pay particular attention to small chart labels, dense tables, and instructions that require zooming.
Remove outdated instructions and identify any slides that need an explanation beyond their visible text.
Method 1: Turn PowerPoint into a Video with AI Narration in JoggAI
Best for: Onboarding, training, and educational videos when you have slides but want to generate the spoken explanation without recording yourself.
With our PPT to Video tool, you can turn existing slides into a narrated video and add an AI presenter.
Step 1: Upload Your PowerPoint
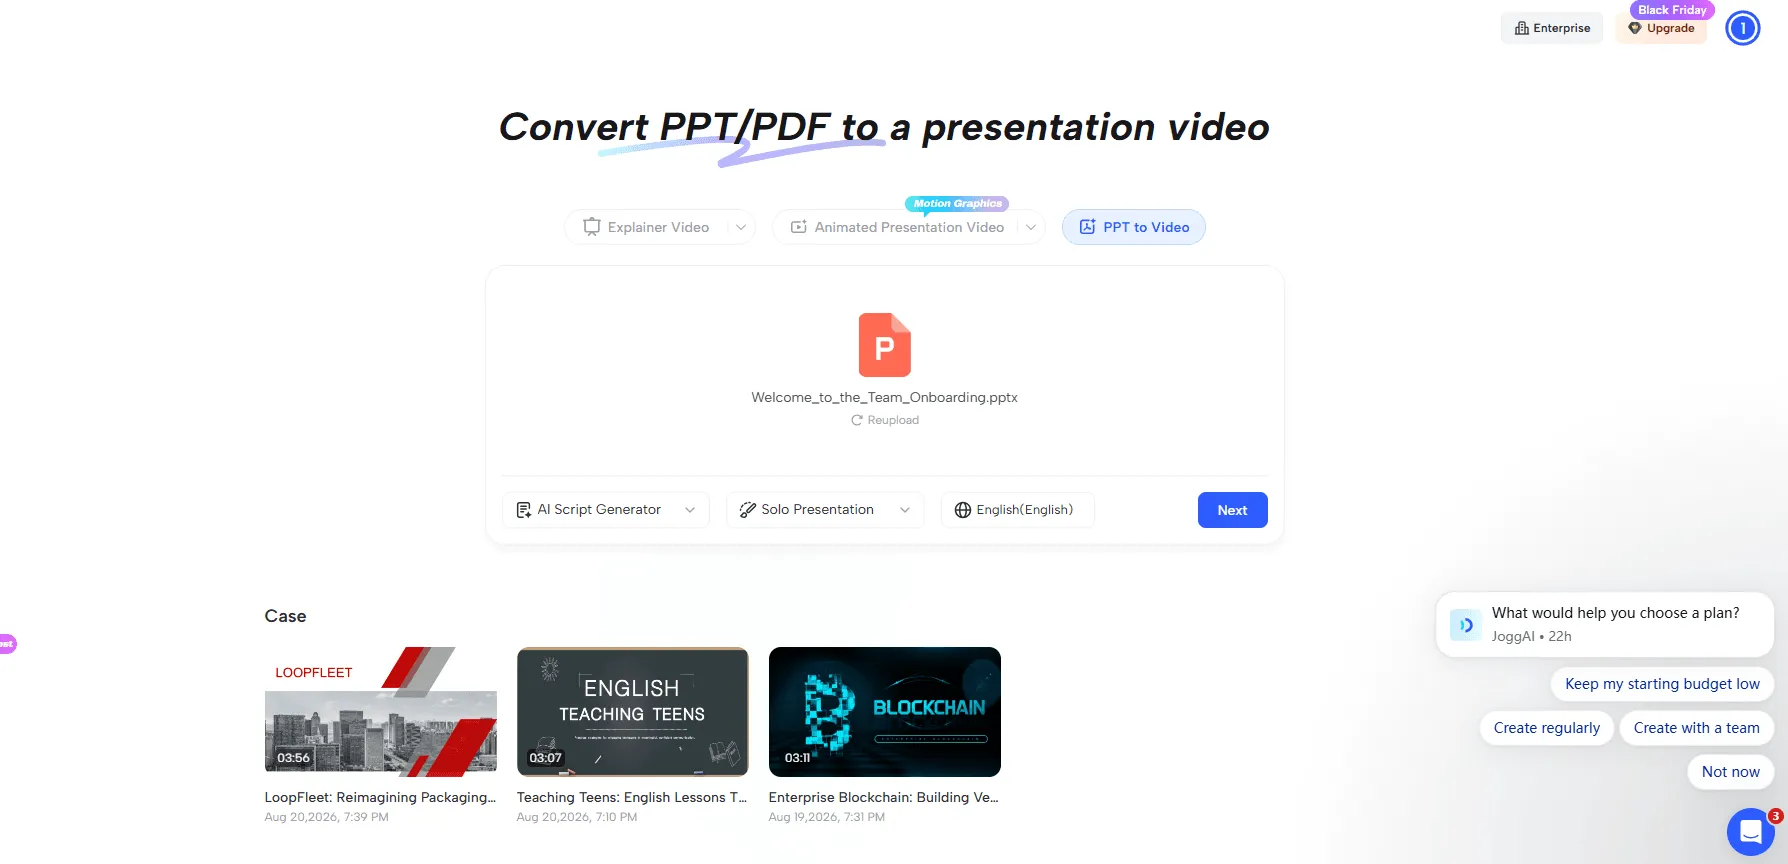
Open the tool and upload your presentation. Supported inputs are PPT, PPTX, and PDF files up to 50 MB.
Use PPT or PPTX when you want to carry over presentation data. We preserve animations, transitions, and embedded audio from these files.
I uploaded the PPTX to use its Speaker Notes in the next step. A PDF serves as static visual input.
Check the imported slides, especially custom fonts, tightly spaced text, and charts. If an element is already unreadable in the source deck, fix it there before building the video around it.
Step 2: Choose How to Create the Narration
We offer three ways to prepare your script. Choose according to the material you already have:
| Script option | Use it when | What to review |
|---|---|---|
| Use Speaker Notes | Your PPT or PPTX contains explanations for each slide | Turn shorthand and presenter reminders into complete spoken sentences |
| Manual Input | You have an approved script | Match each passage to the slide it explains |
| AI Script Generator | Your slides contain headings or bullet points that need expansion | Check the draft against the source material and supply missing context |
I chose Use Speaker Notes for Welcome to the Team because I’d already written the explanations for each slide. Expand brief presenter reminders into sentences the audience can follow.
For example, here is how a first-day checklist could become a spoken explanation:
Text on the slide
-
Activate your account
-
Review your schedule
-
Know who to contact
Example narration
Before your first day, follow the account activation instructions in your welcome email. Once you’re signed in, review your schedule and check who to contact if you need help. Keep that contact information handy in case you have trouble accessing a tool.
Step 3: Choose an AI Voice and Presenter
Choose the language and voice, then decide whether an AI presenter helps the explanation. For an onboarding welcome, a visible presenter can introduce the material. For a detailed process diagram, preserving space for the diagram may matter more.
When choosing a voice, listen to a passage containing the names or abbreviations used throughout the deck.
Step 4: Preview the Narration with the Slides!
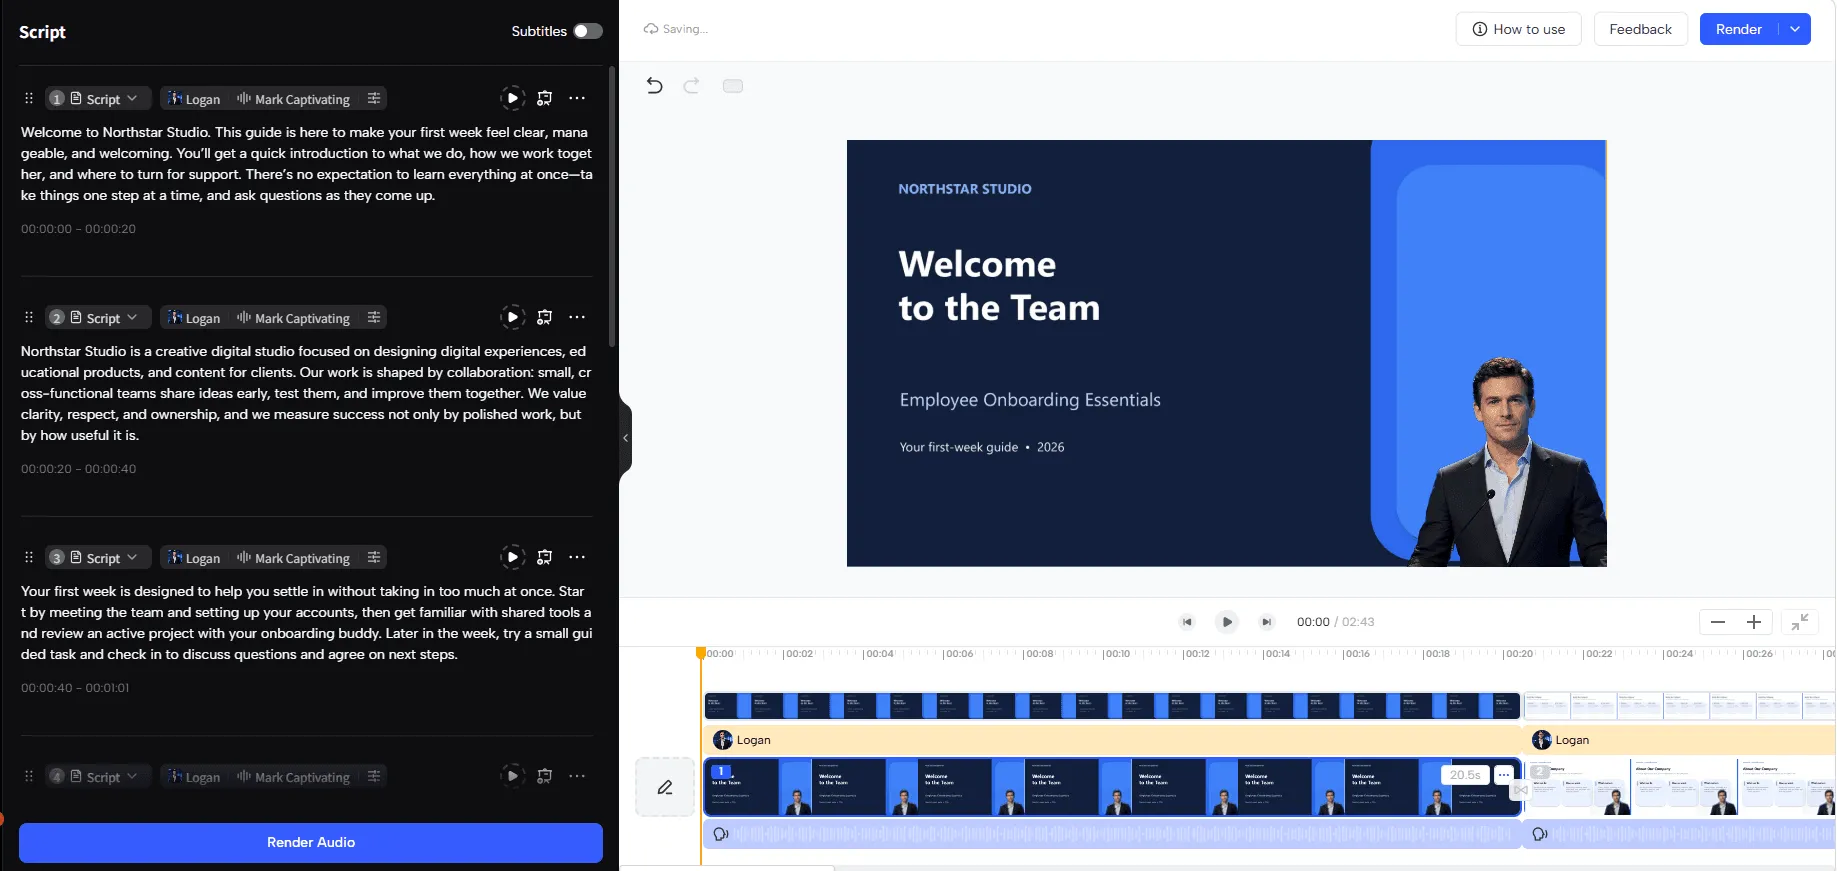
Preview the video in sequence and check three things:
-
Information: Does the narration match the notes, including names, dates, and procedures?
-
Sequence: Is the relevant slide or visual visible when the voice refers to it?
-
Readability: Can viewers follow the explanation while reading the slide, without a presenter or caption covering essential information?
Make specific corrections. If an explanation belongs to the next slide, move that script passage. If the presenter obscures a diagram, change the layout. If a dense slide is difficult to follow, simplify it or divide the explanation across more slides.
Step 5: Render and Download the MP4
Check the estimated credits, then render and download the MP4. You can find the available plans on our pricing page.
Play the downloaded file once to check that the audio and slide order are intact, then share it through your learning platform or internal portal.
Click to preview the video examples.
Method 2: Export PowerPoint Directly to MP4
Best for: A finished presentation that needs a shareable video file, including a deck with narration you have already recorded.
Direct export can produce a silent slideshow or include an existing recording. Written Speaker Notes alone do not become spoken audio through the export command.
Export on Windows
Follow Microsoft’s video export instructions:
-
Save the presentation and select File → Export → Create a Video.
-
Choose the video quality. Full HD (1080p) is a useful starting point; lower resolutions produce smaller files.
-
Select Use Recorded Timings and Narrations to include a recording. Otherwise, choose Don’t Use Recorded Timings and Narrations and set the slide duration.
-
Select Create Video, choose MPEG-4 Video (.mp4), and save.
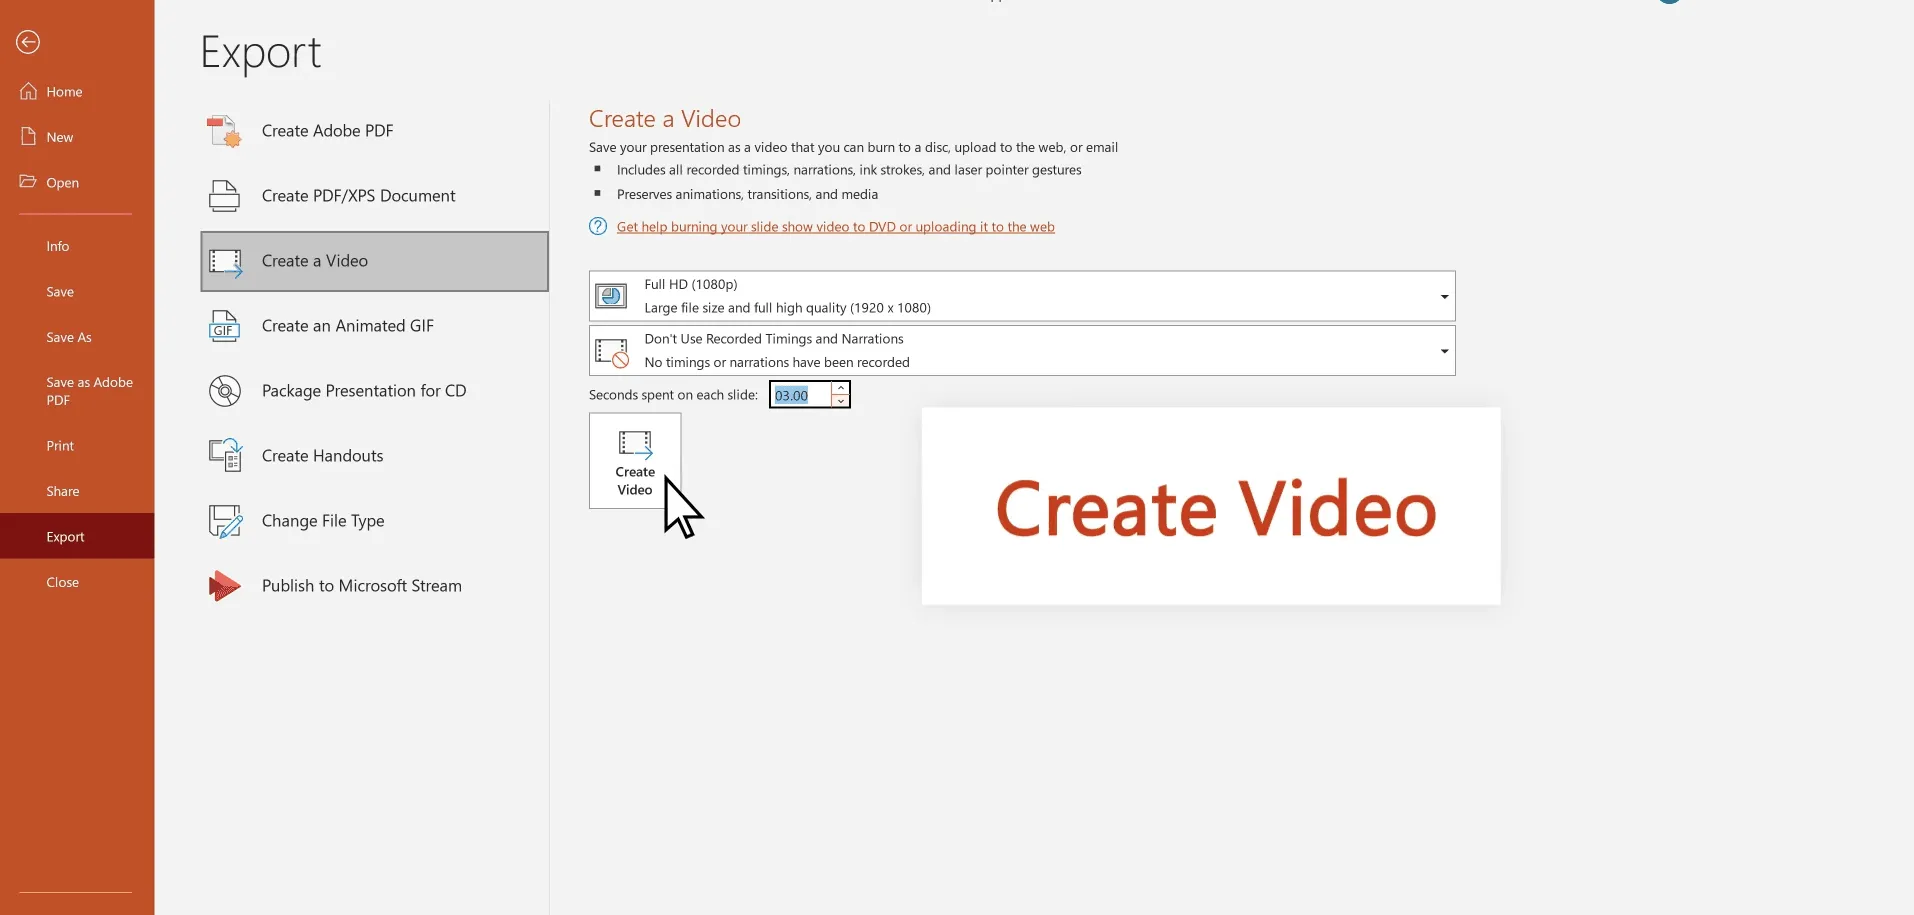
Without recorded timings, the default is five seconds per slide. Give detailed charts and instructions more time than title slides. Use individual timings or the recording workflow in Method 3 when different pages need different durations.
Export on Mac
In a supported desktop version, follow Microsoft’s PowerPoint for Mac instructions:
-
Select File → Export.
-
Choose MP4 or MOV under File Format.
-
Select the quality and enable Use Recorded Timings and Narrations when needed. Otherwise, set a slide duration.
-
Select Export.
Microsoft lists several Mac export limitations: animations do not play in the movie, some transitions behave differently, and other embedded media does not play even though recorded narration can be included. Test a slide containing those elements before exporting the full deck.
Method 3: Record Your PowerPoint Presentation with Your Own Voice
Best for: Lessons, project updates, and walkthroughs where your own explanation or camera presence is part of the presentation.
PowerPoint records your explanation along with the time you spend on each slide.
-
Open Record or Slide Show → Record Slide Show, depending on your version. Select your microphone and enable the camera if you plan to appear.
-
Record a short test. Listen for background noise, volume, and microphone distortion.
-
Record the presentation, advancing as you speak. Pause during slide transitions because narration is not captured during the transition itself.
-
Play back the recording. Where supported, re-record the affected slide rather than the whole presentation.
-
Export the video with recorded timings and narration enabled, using the appropriate Windows or Mac steps above.
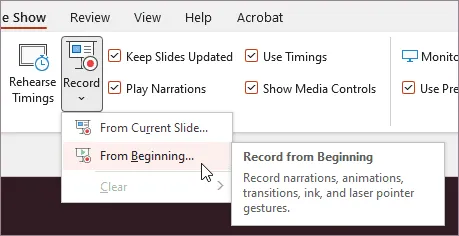
Microsoft’s recording guide covers the version-specific controls. Save the recorded PPTX alongside the MP4 for future updates.
Common PowerPoint-to-Video Problems and Fixes
| Problem | First check | What to do |
|---|---|---|
| The exported video has no narration | Does the narration play inside PowerPoint? | If it does, enable recorded narration during export. Otherwise, add an audio track using Method 1 or Method 3. |
| Slides advance too quickly | Are all slides using one short duration? | Set suitable timings or record the presentation at the intended pace. |
| Text or charts look blurry | Is the whole frame blurry or only one asset? | Increase export resolution for the whole frame; replace a low-resolution screenshot or chart in the source deck. |
| Animations or media are missing | Which export platform and media type are involved? | Check the relevant Windows or Mac limitations, test the affected slide, and replace unsupported elements if necessary. |
| Export appears stuck | Is the deck large or full of media? | Allow time for processing. Try a lower resolution or export a small copy to isolate a problematic slide. |
| The video plays but will not upload | Does the destination accept its format, encoding, and size? | Follow its upload specifications; reduce the size or split a long presentation when necessary. |
Frequently Asked Questions
Can I Convert PowerPoint to Video for Free?
Video export is included in compatible licensed desktop versions of PowerPoint. Our AI workflow uses credits, and we offer starter credits for new accounts.
Can I Convert Google Slides into a Video?
Download the presentation as a PPTX, then open it in PowerPoint or upload it to our PPT to Video tool. Check the layout after downloading, especially custom fonts and charts.
What If I Don’t Have the PowerPoint Desktop App?
You can upload the file to our PPT to Video tool and create the narrated video in your browser.
Can I Edit the Video After Exporting?
You can revise the source presentation or video project and export a new MP4. To change an existing MP4 directly, use a video editor. Keep the editable source so future updates do not depend on rebuilding the presentation from the finished video.
Turn Your Slides into a Video People Can Follow
Upload your presentation to our PPT to Video tool to turn your existing slides and notes into a narrated training video.