


JoggAI Animated Presentation VIdeo Tutorial
JoggAI Animated Presentation can turn a topic or existing source materials into a complete presentation video. It automatically helps organize the content, build the storyboard, and combine AI presenters, B-roll, and animated slides.
🎥 Watch the Full Tutorial
Step 1: Add Your Topic and Materials
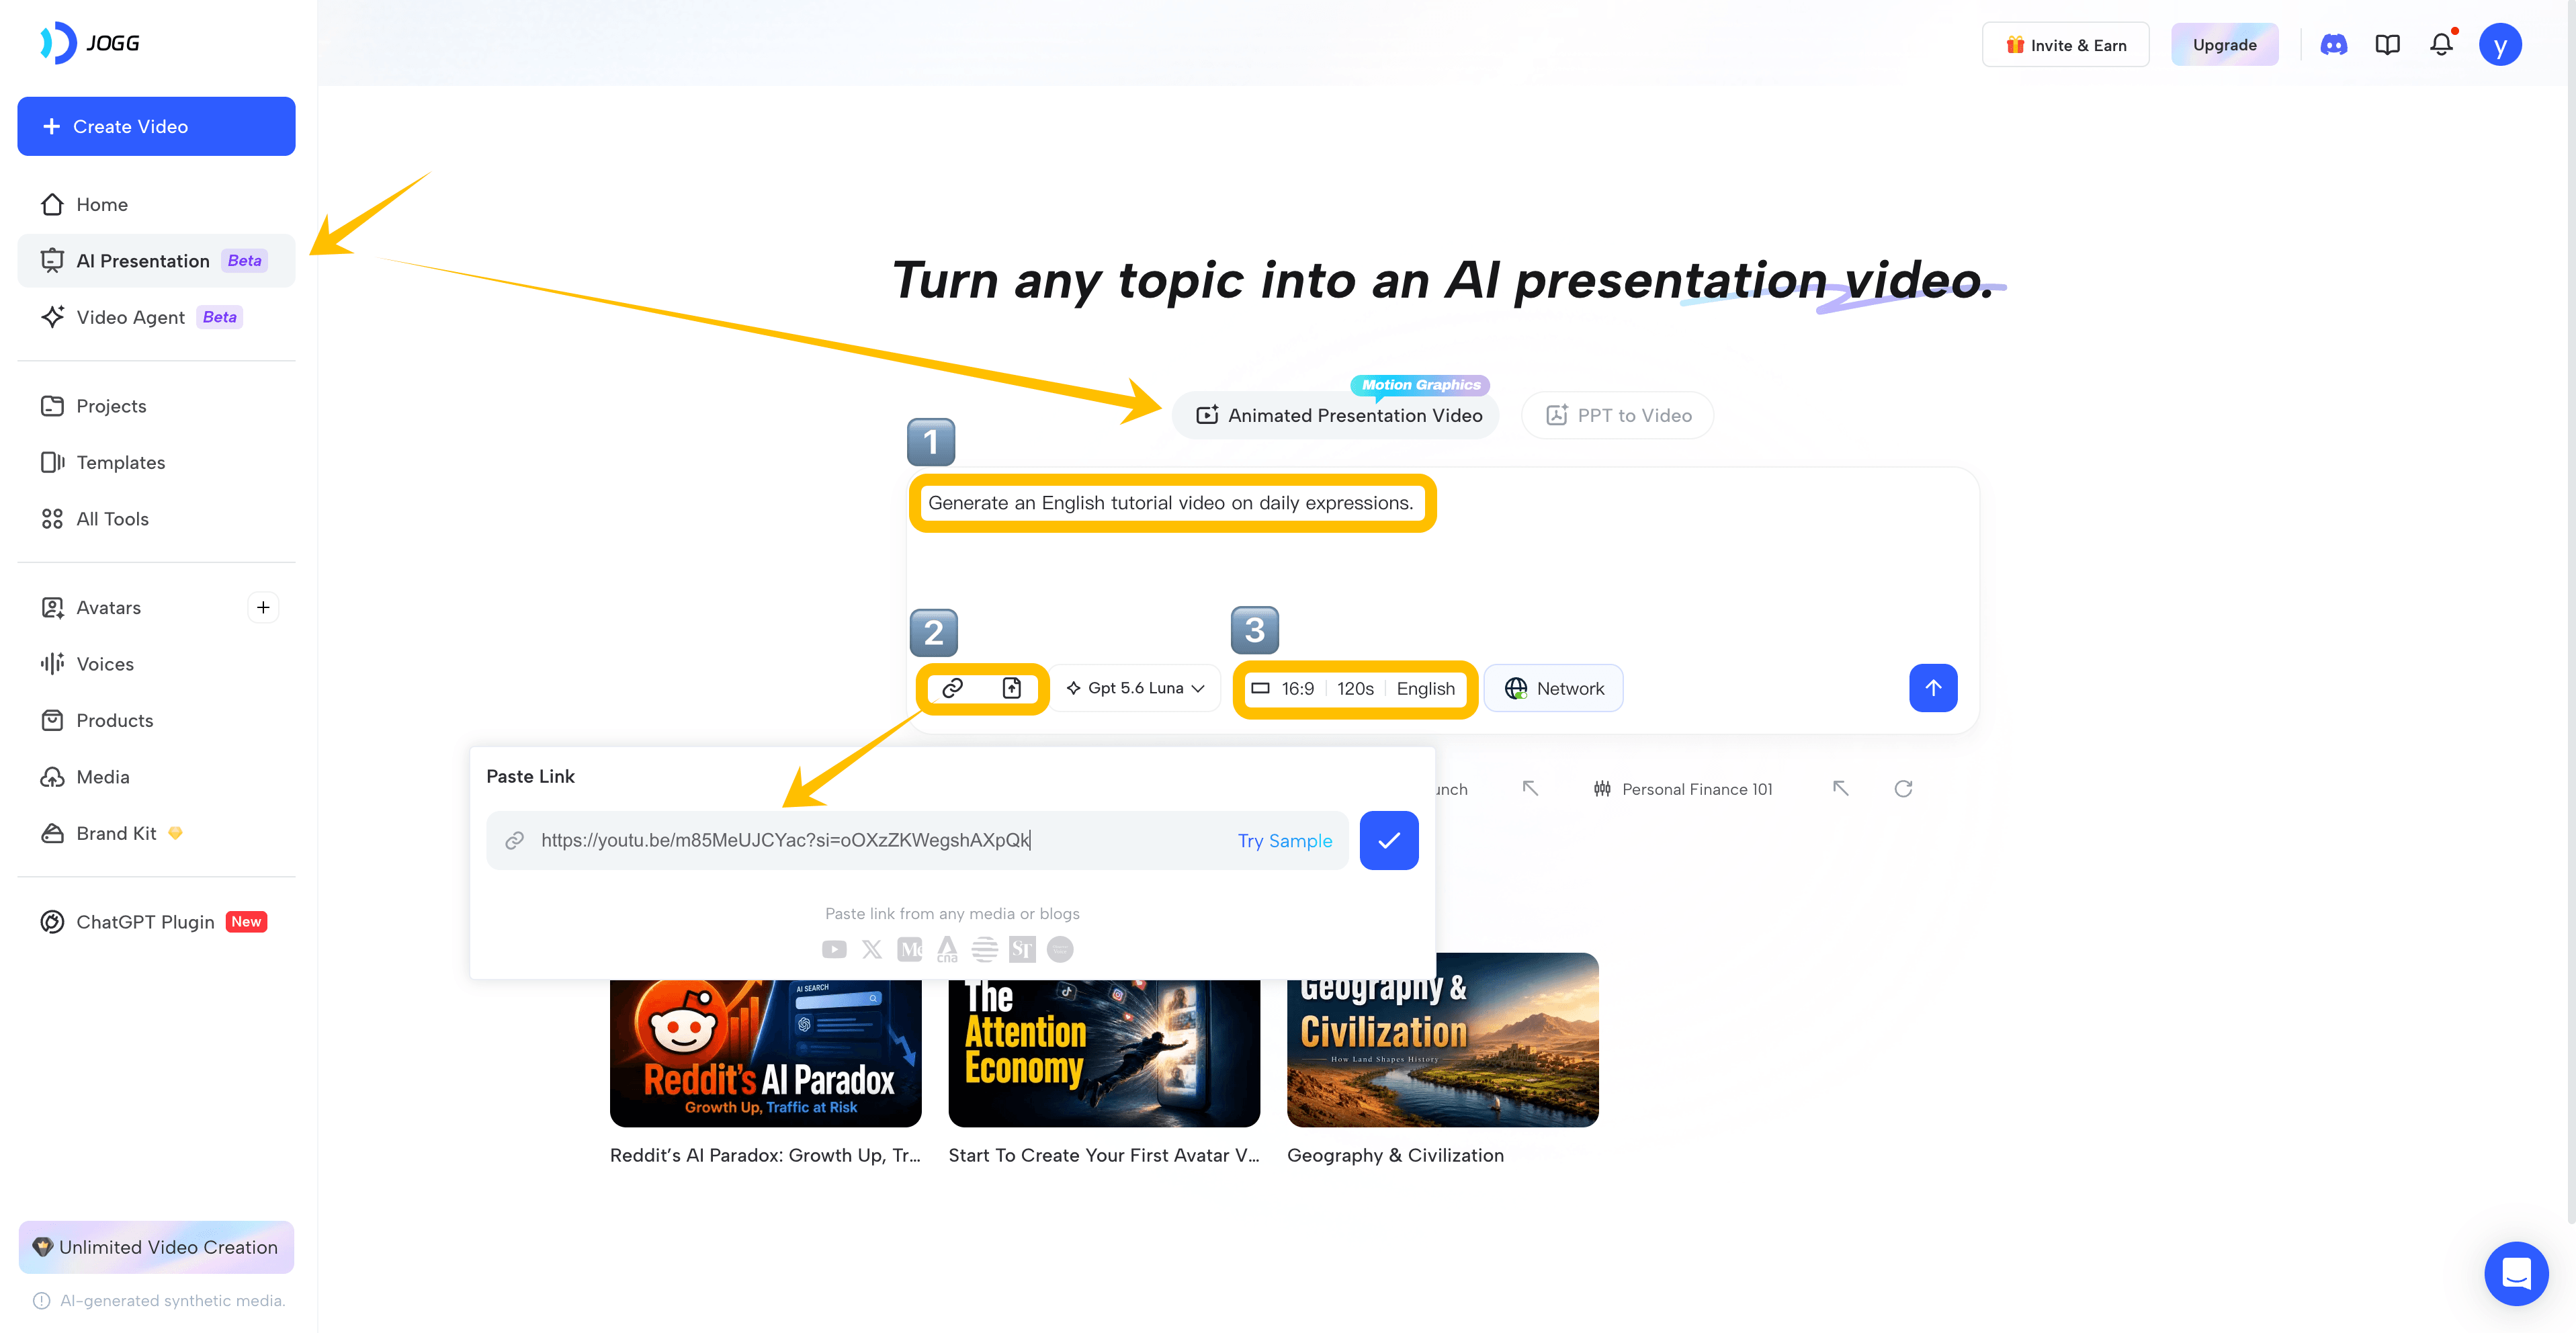
Open JoggAI and select AI Presentation. Enter the topic you want to cover. For example::
Generate an English tutorial video on daily expressions.
You can also paste a webpage link or upload PDFs, documents, course materials, and other references. Adding source materials helps JoggAI create content based on your information instead of producing a generic video.
Finally, choose the aspect ratio, duration, and language.
Step 2: Confirm the Outline and Storyboard
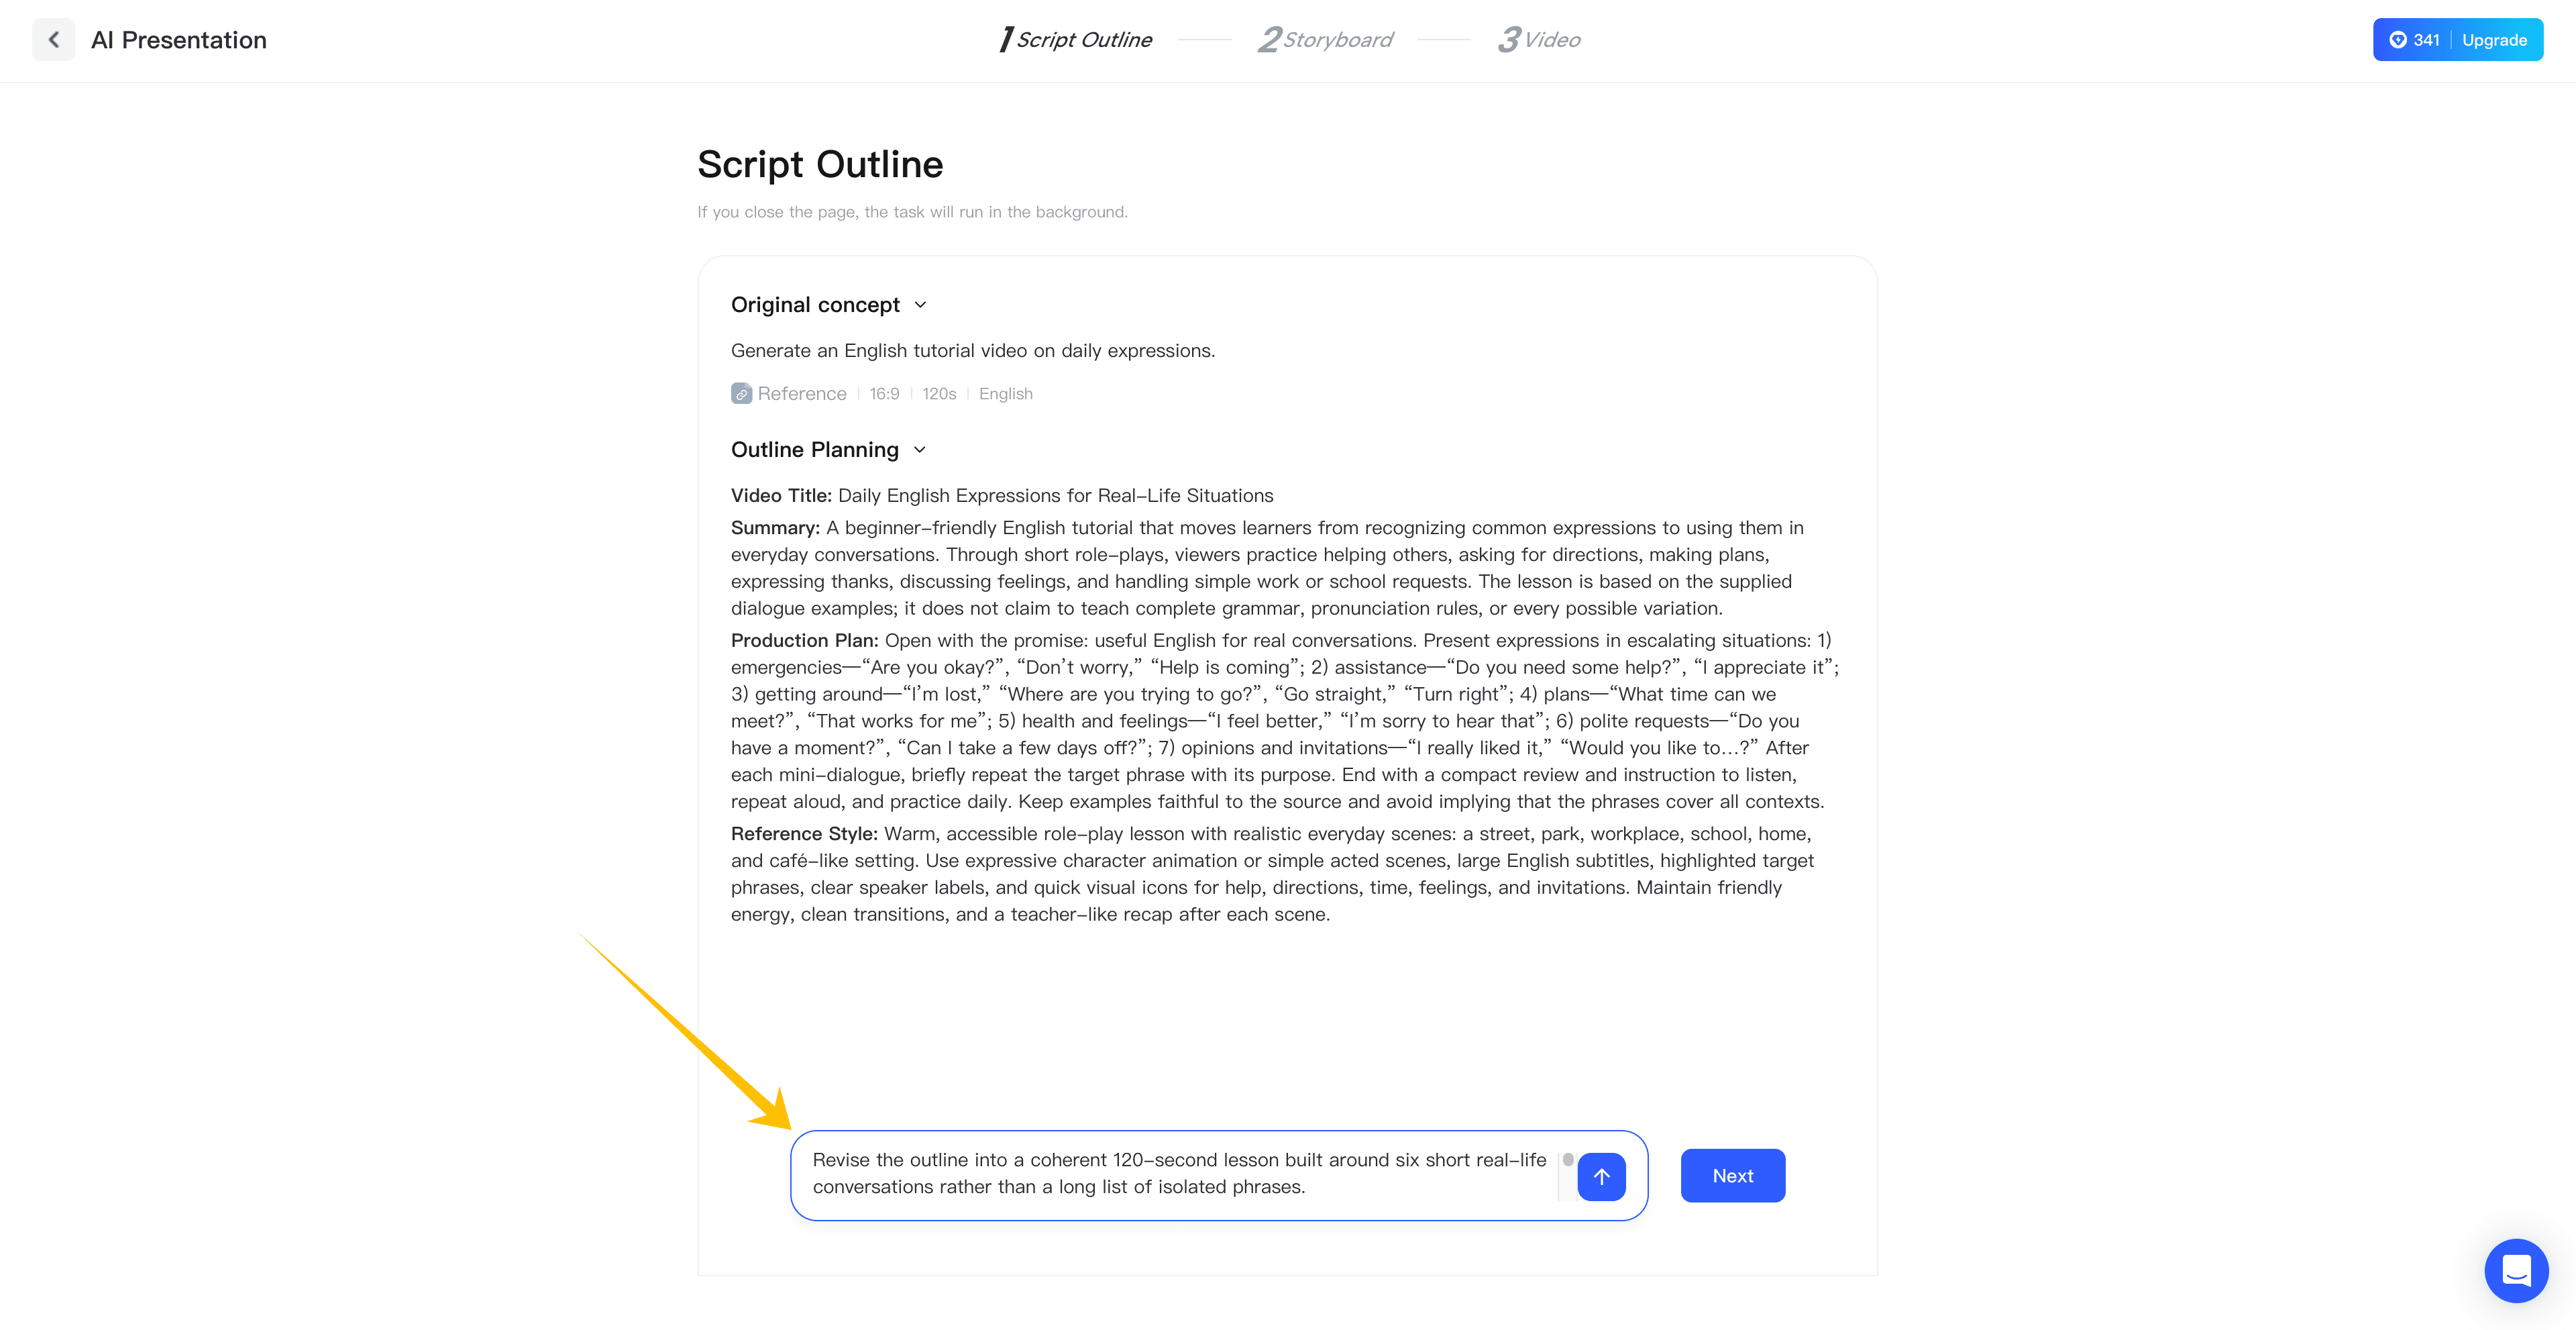
JoggAI first generates a script outline based on everything you provided. The purpose of this step is to lock in the direction before anything gets rendered.
If something is off, you do not have to rewrite it word by word. Enter your revision request in the prompt box, and JoggAI can regenerate the relevant section.
After you click Next, JoggAI automatically divides the script into individual scenes and creates a storyboard.
Step 3: Choose How Each Scene Looks
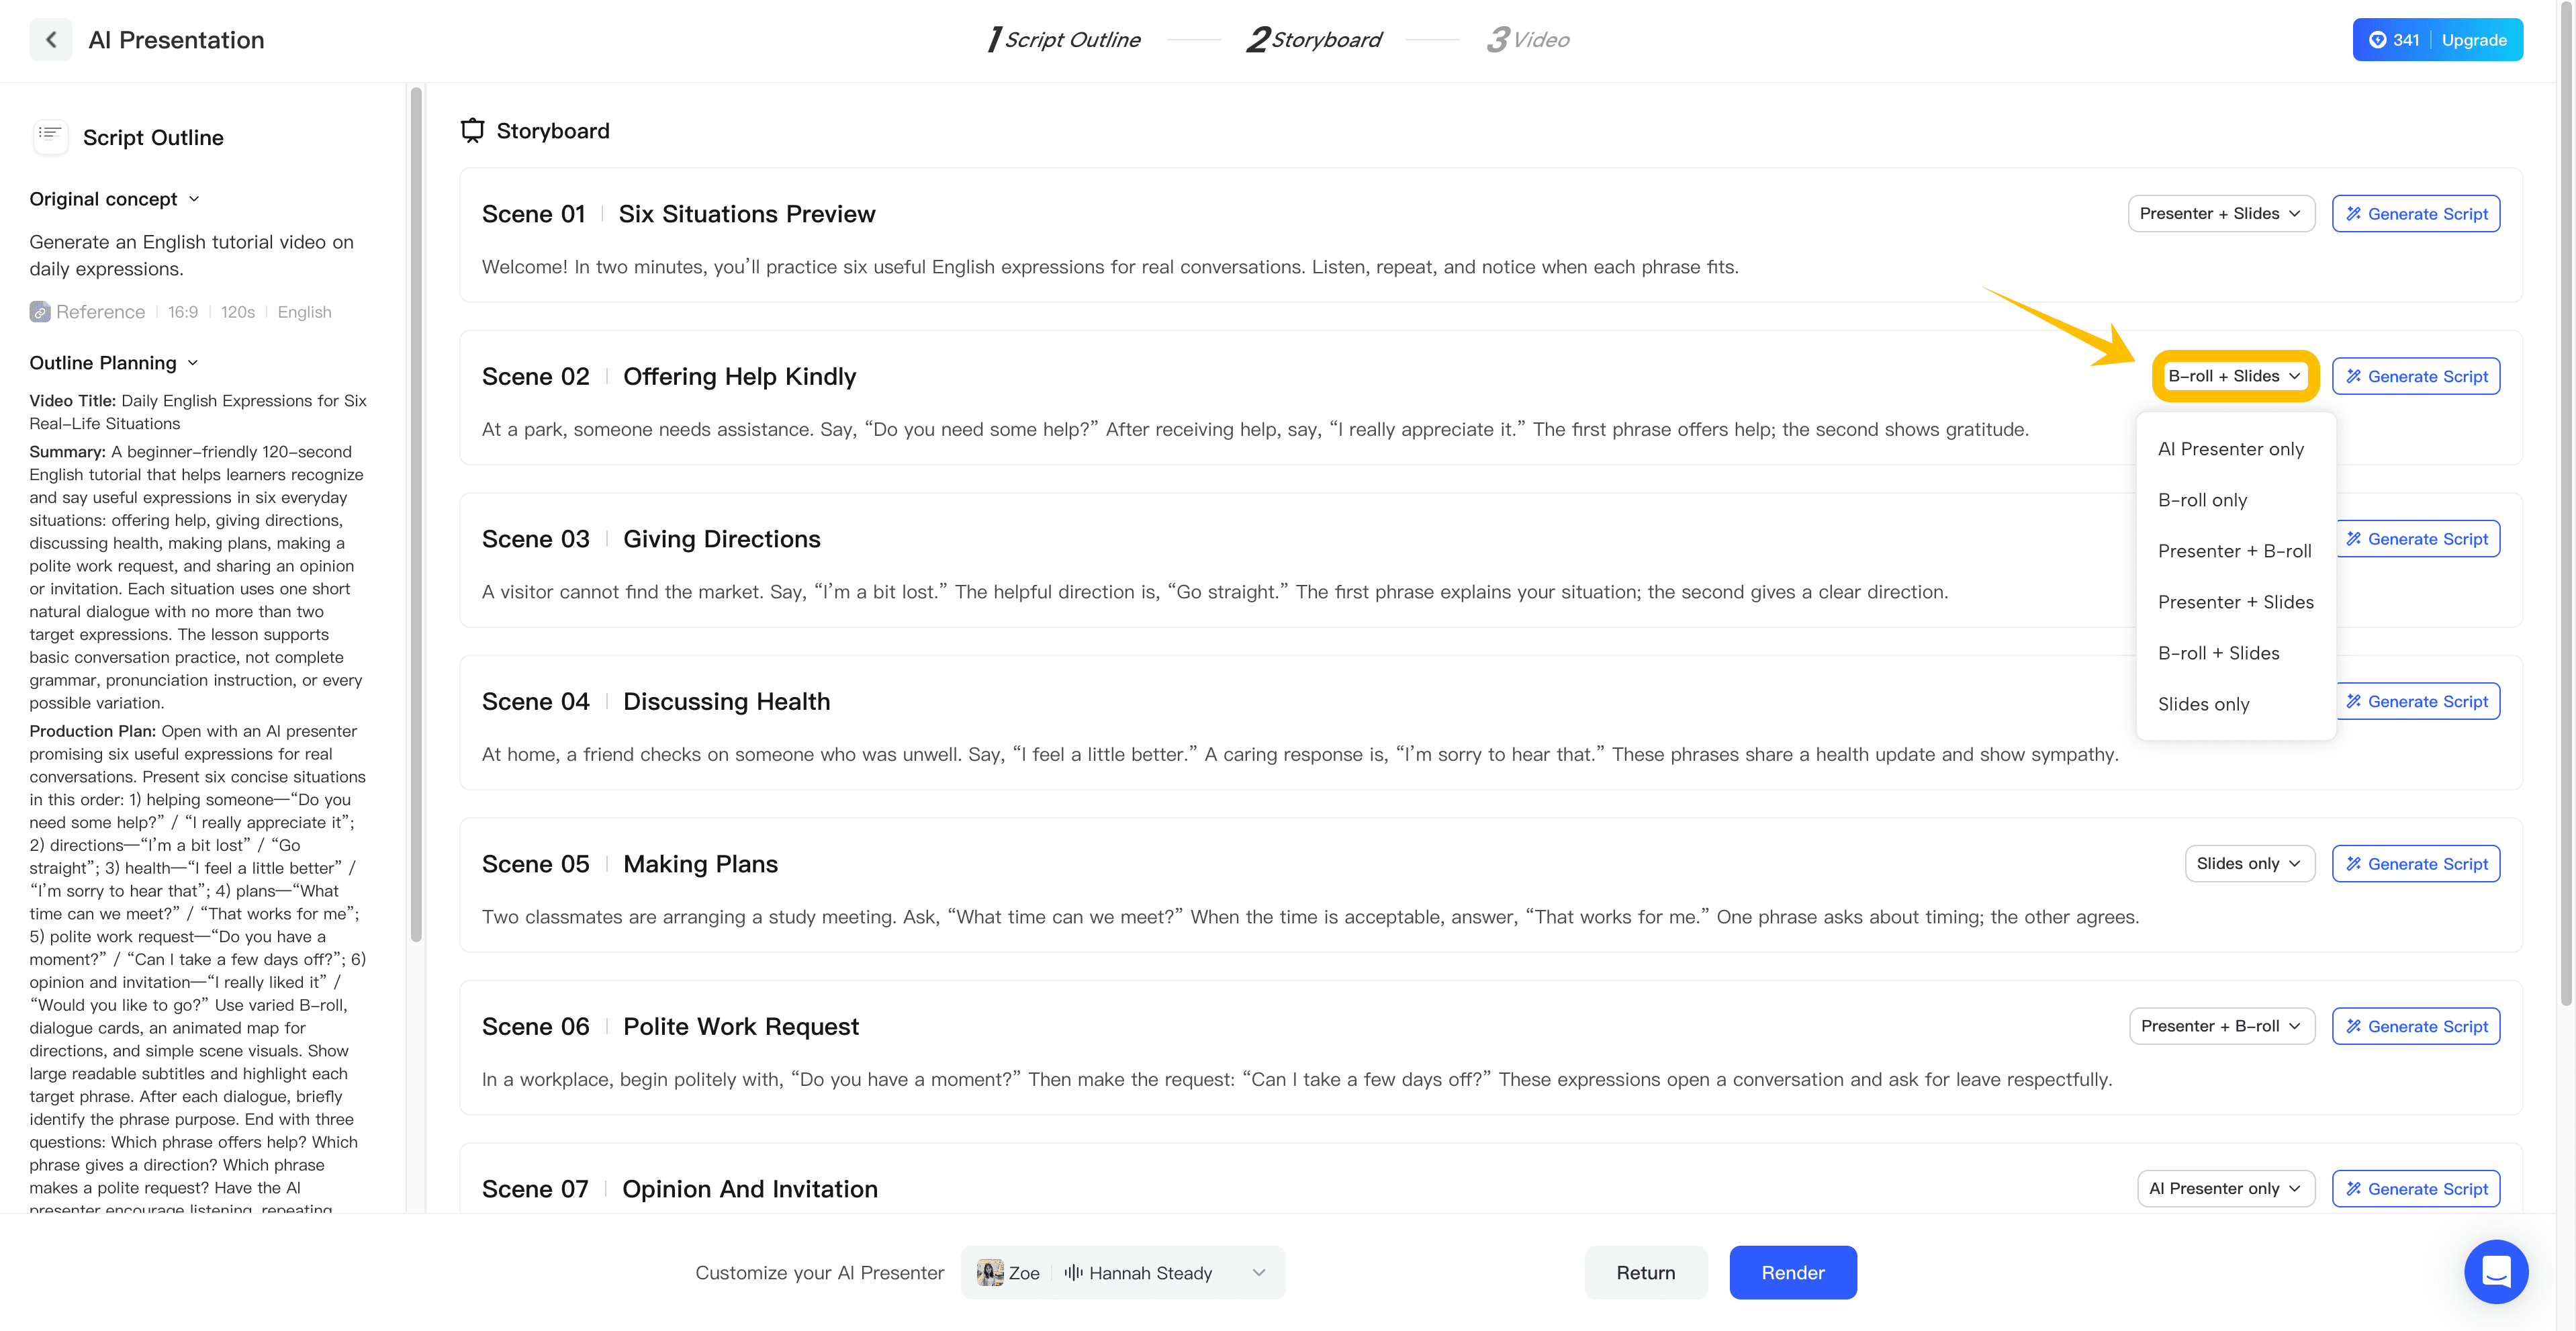
Every scene can use a different visual format, including:
-
AI Presenter only
-
B-roll only
-
Presenter + B-roll
-
Presenter + Slides
-
B-roll + Slides
-
Slides only
You do not have to use one style for the whole video. Use an AI presenter for openings or conclusions, B-roll for real-world examples, and dynamic slides wherever information needs more visual impact.
Dynamic slides can create numbers that count up, charts that draw themselves, comparison tables, timelines, and processes that advance with the narration.
Step 4: Select the Presenter, Voice, and Render
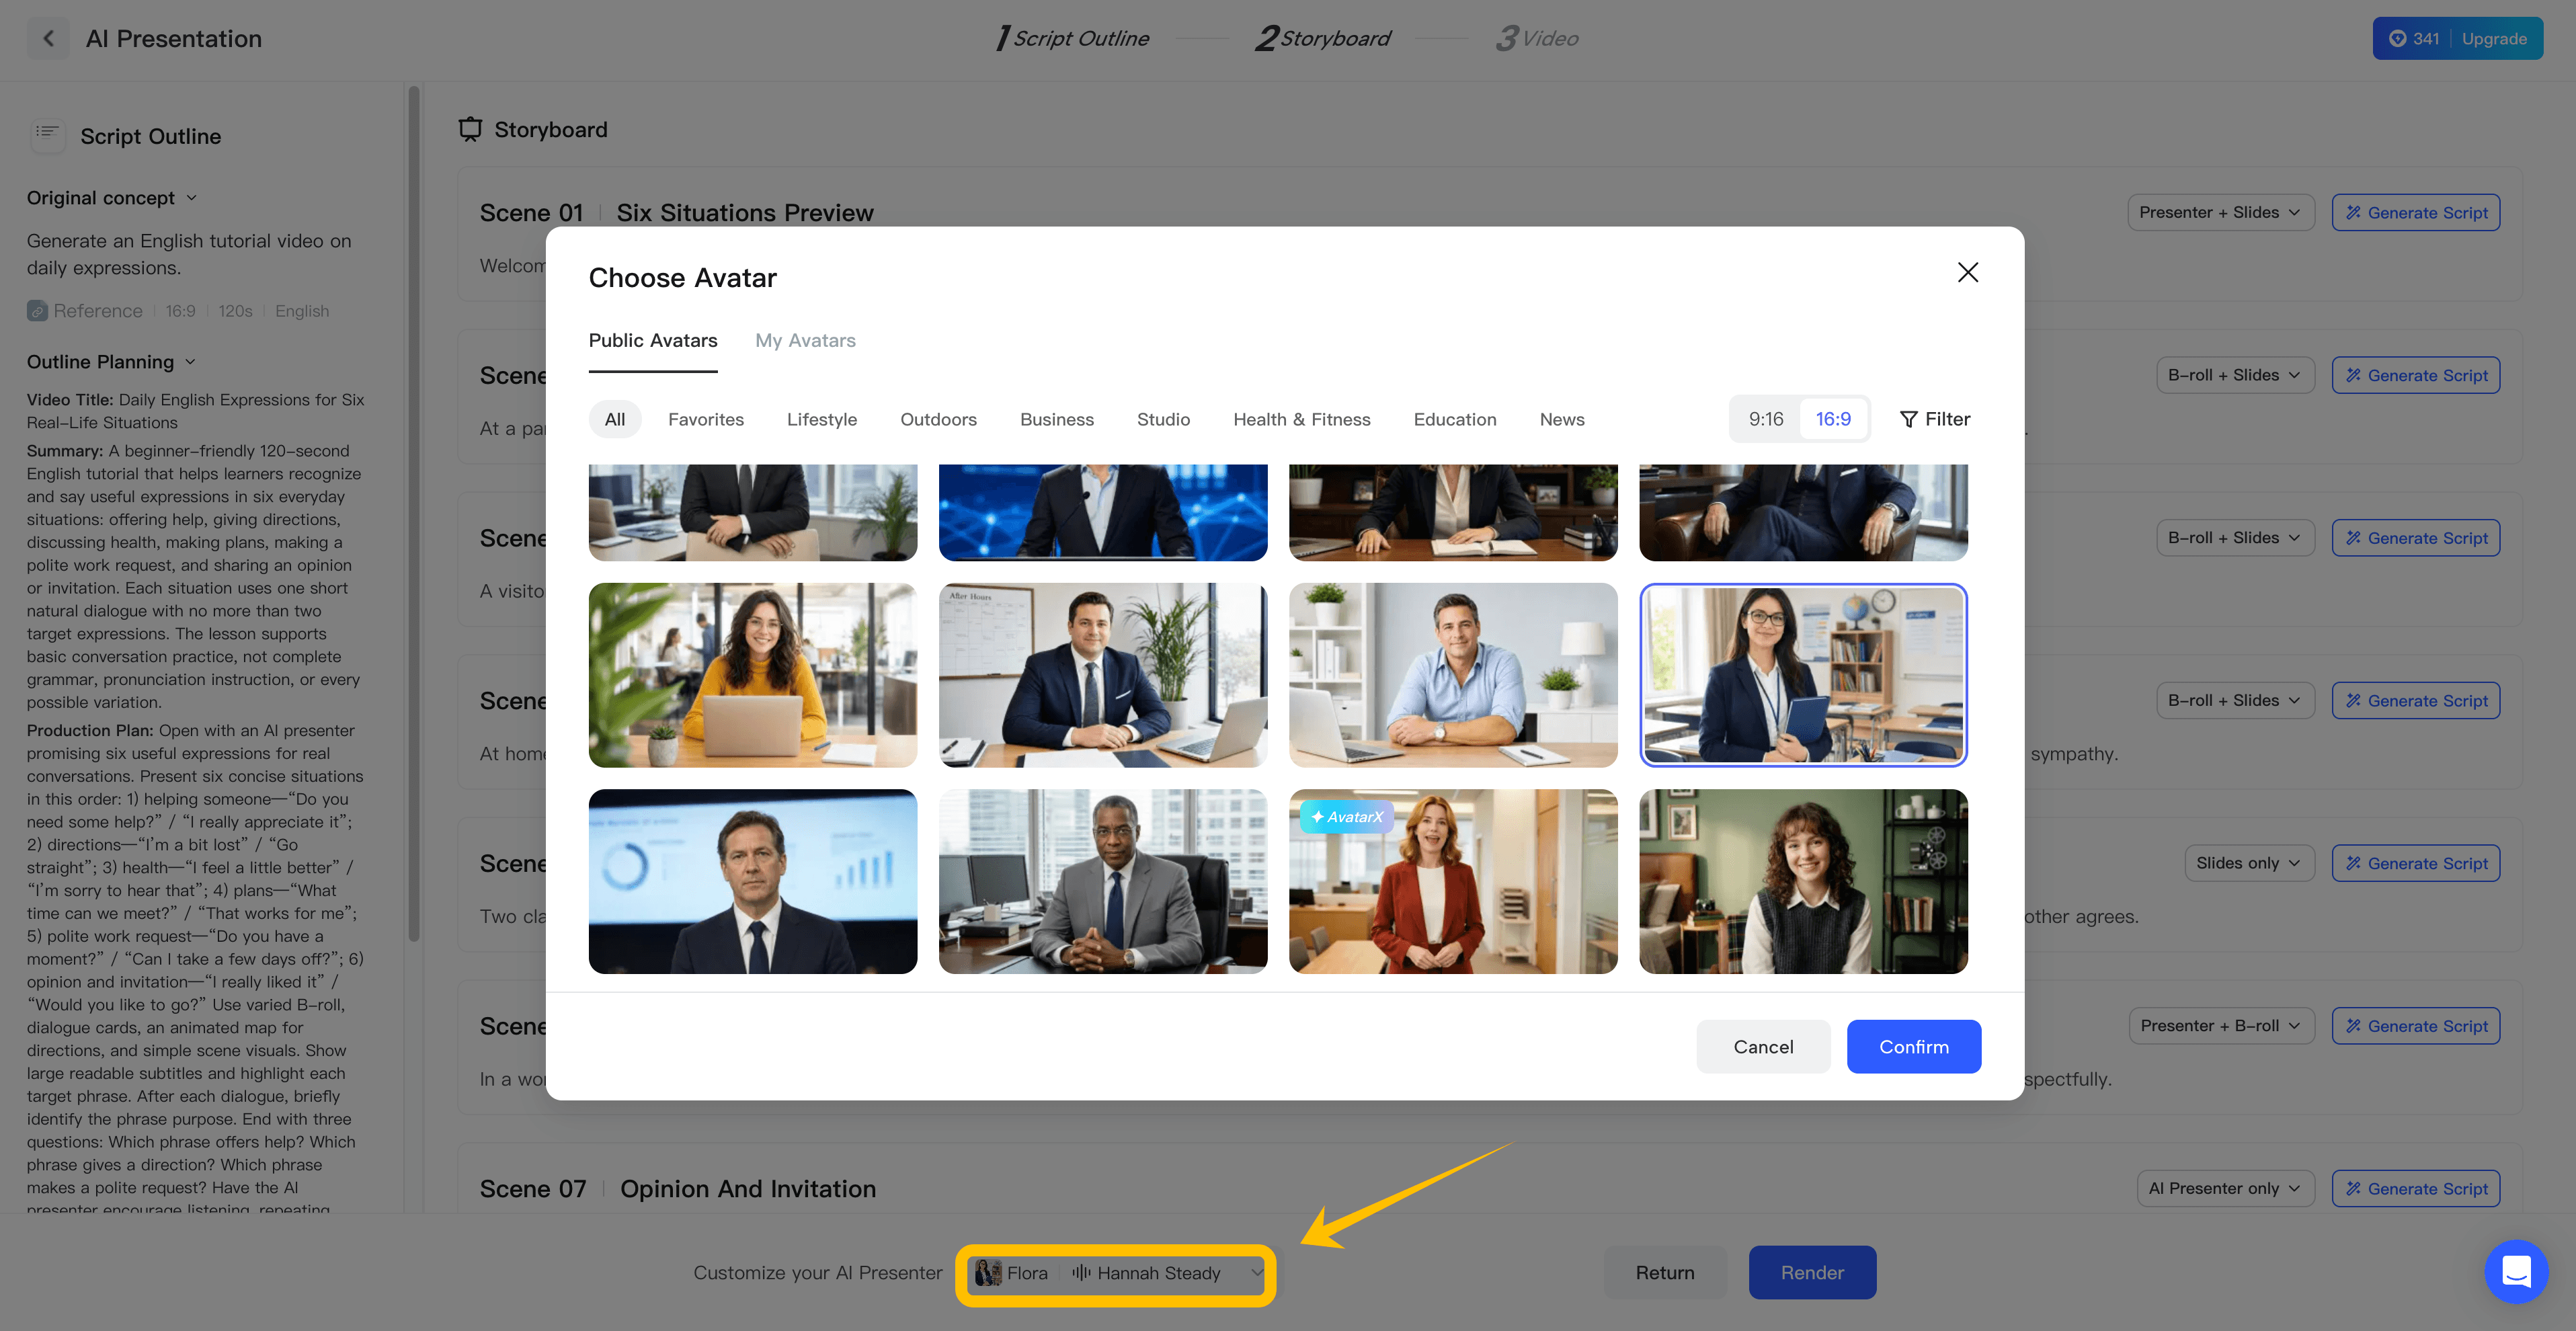
Choose a presenter from JoggAI’s avatar library, or select your own avatar under My Avatar. Then choose and preview an AI voice.
When everything is ready, click Render. In the editor, generate the voice-over with Render Audio and preview the complete video.
Step 5: Edit and Export
If an individual slide is not right, select that scene and regenerate it without recreating the entire video.
When writing a revision prompt, specify two things:
-
What the slide should look like
-
How the elements should move
Example:
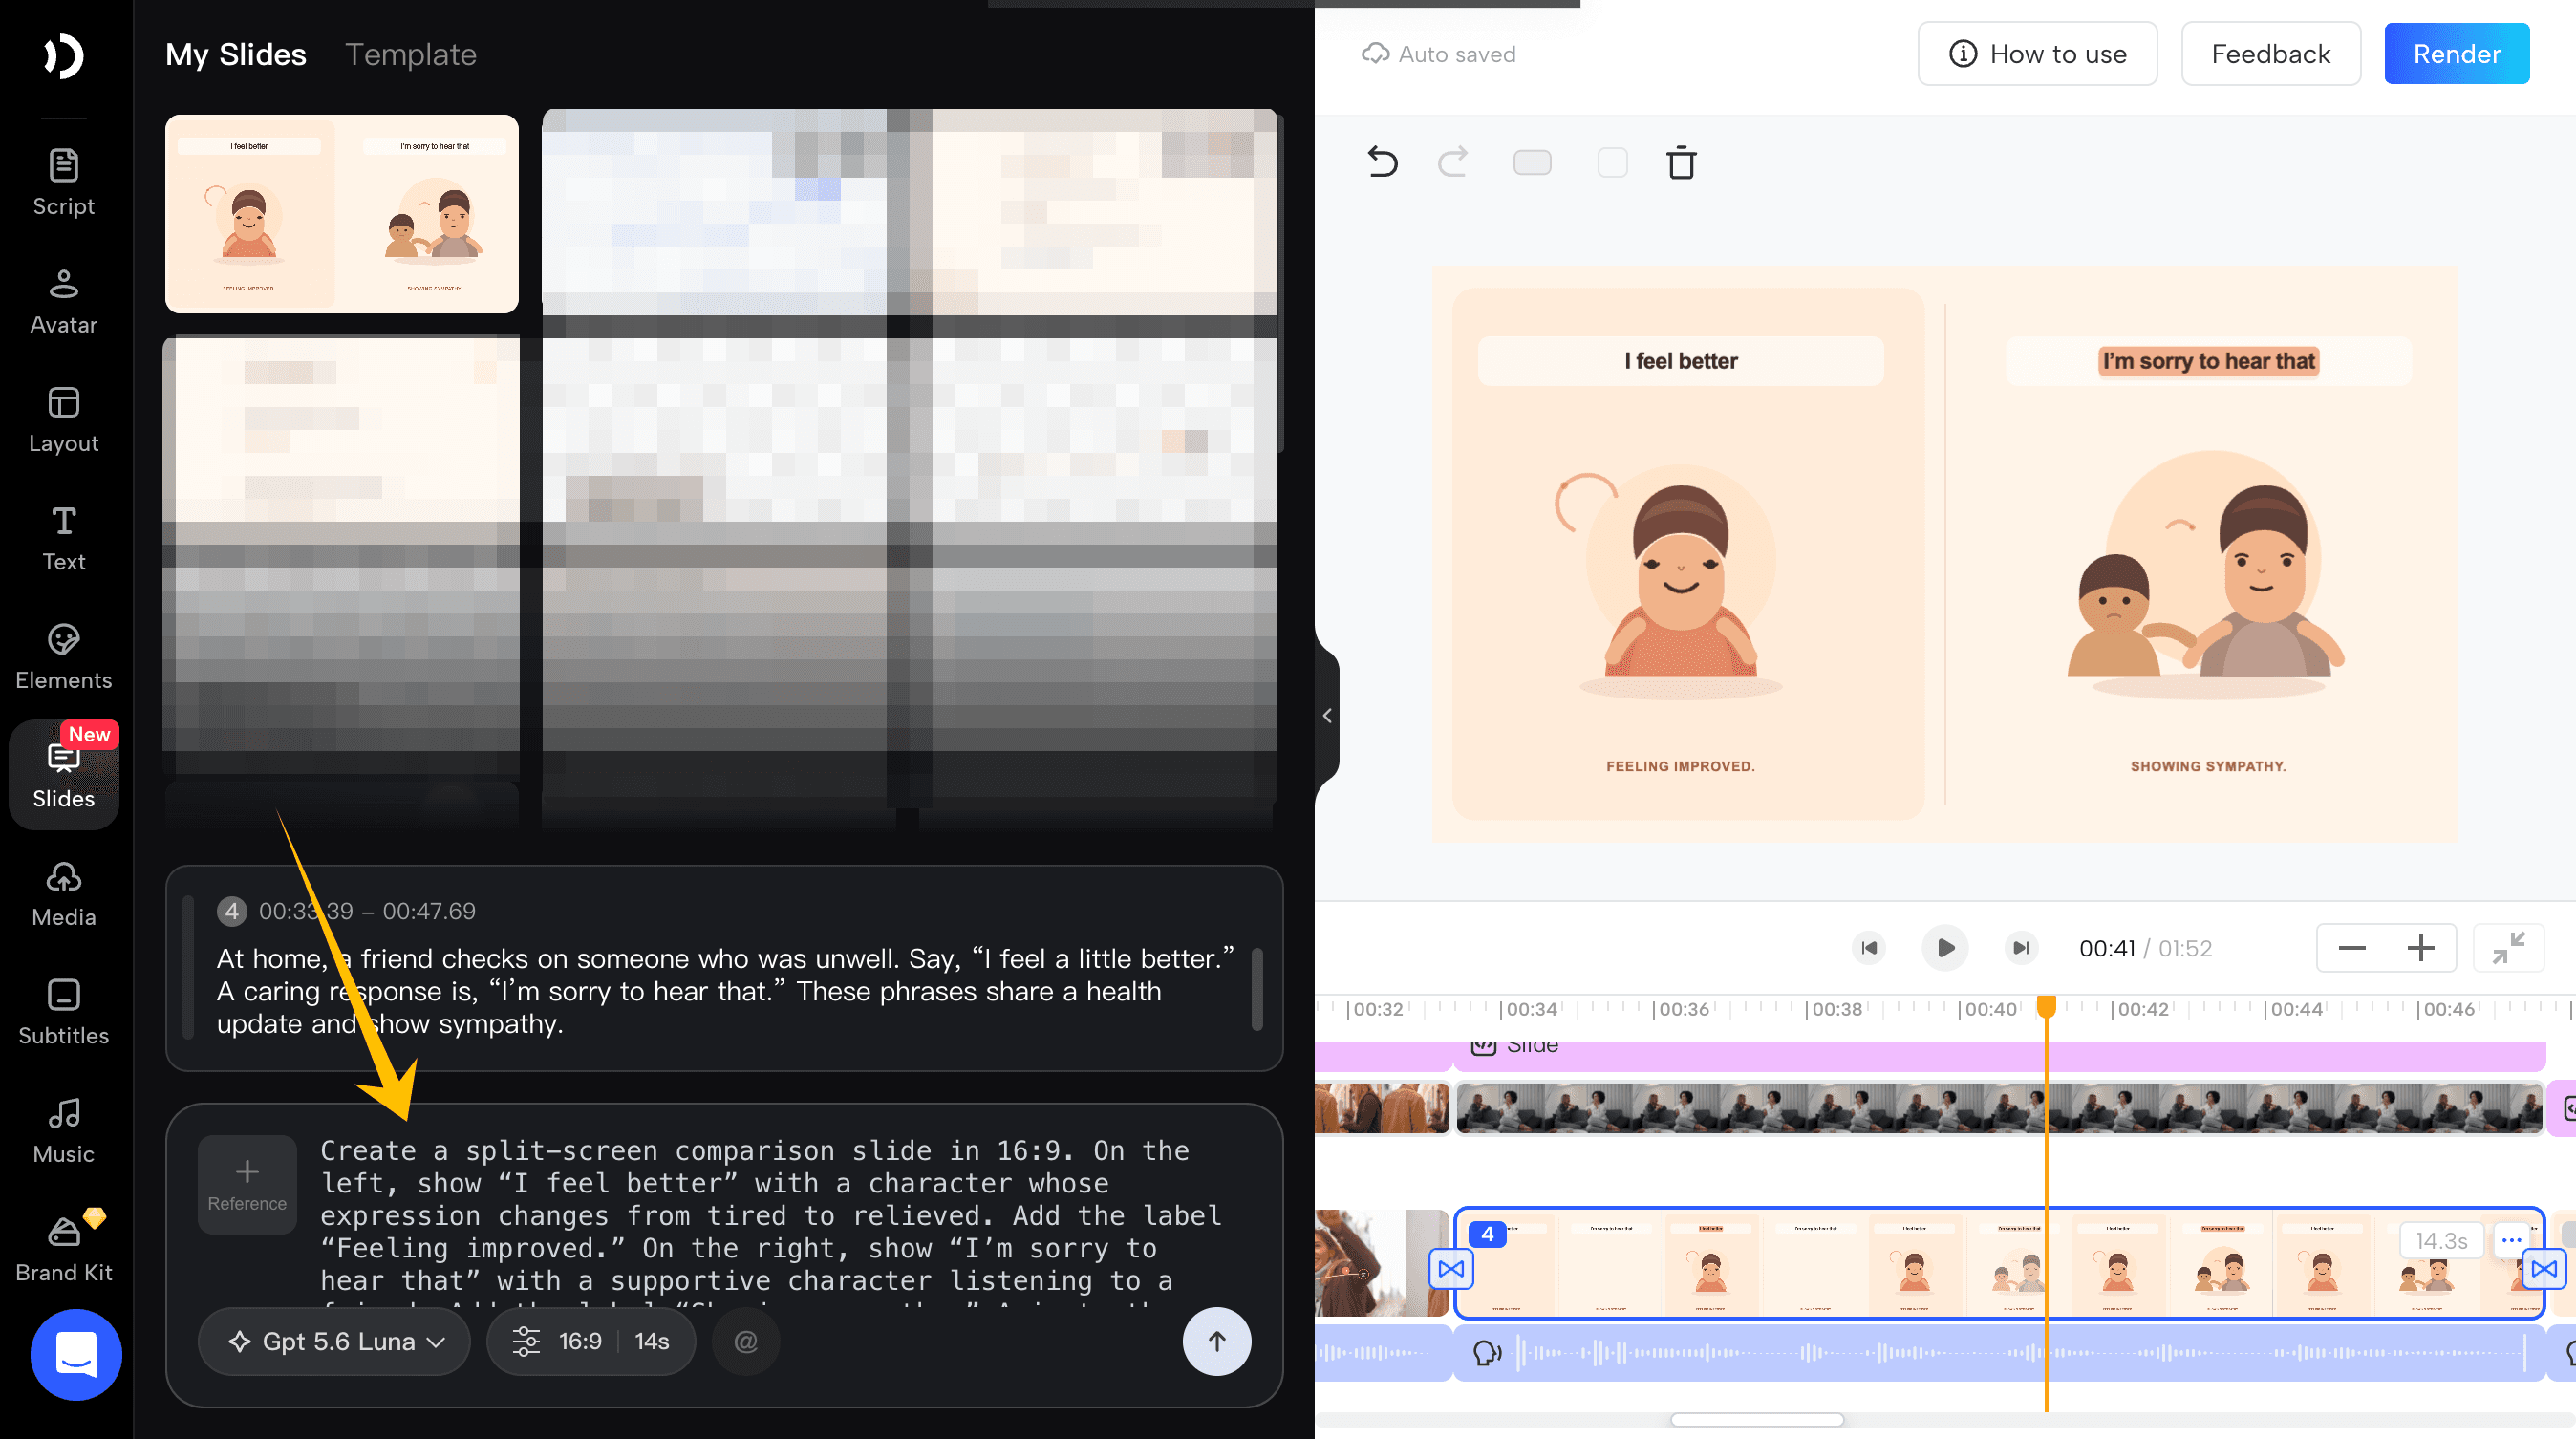
Create a split-screen comparison slide in 16:9. On the left, show “I feel better” with a character whose expression changes from tired to relieved. Add the label “Feeling improved.” On the right, show “I’m sorry to hear that” with a supportive character listening to a friend. Add the label “Showing sympathy.” Animate the left side first, then the right side. Highlight each target phrase as it is spoken. Use warm colors and avoid exaggerated emotional reactions.
You can also replace B-roll, upload your own footage, select a caption style, and add background music. Once everything looks good, generate and export the final video.
Quick Recap
Enter a topic and source materials, confirm the outline, choose how each scene looks, select the presenter and voice, then edit and export.